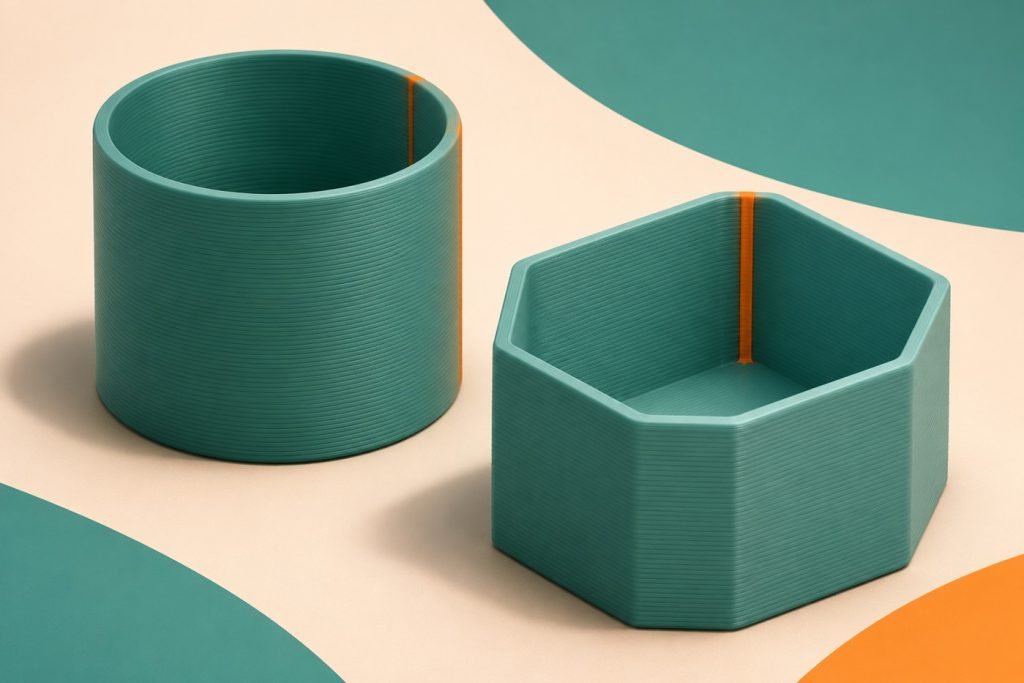
Place the seam where it matters least to the finished object: a hidden edge, a recessed corner or a deliberately chosen rear face. Moving it is usually a better first decision than scattering marks across a surface you want to look clean. Check the sliced preview before changing the extrusion settings.
Choose the viewing side first
A display stand, a round knob and a fitted sleeve have different priorities. Mark the visible face and any mating surface before deciding where the seam can go. An unobtrusive mark on the outside may still be inconvenient if it sits on a sliding contact surface.
Prusa explains the seam as the start and finish of perimeter loops. A cylinder makes it particularly noticeable because it has no sharp corner in which to hide it. Placement changes where those starts occur; it does not turn an ordinary multi-wall object into a seamless surface.
| Priority | Placement to investigate |
|---|---|
| Front-facing display | A rear face that stays out of the normal view |
| Recessed geometry | An inconspicuous inner corner |
| Round object | One deliberate line versus dispersed marks |
| Sliding fit | A location outside the important contact area, where geometry allows |
Random distributes the marks; it does not delete them
PrusaSlicer’s Aligned option keeps starts largely together, while Random spreads them and can leave small surface marks. Rear seeks the back of the print bed, not an abstract “back” of your design. After rotating the model, inspect the result again rather than assuming the display face is still protected.
Compare these choices on the actual object. For a part seen from only one direction, a single hidden line may be preferable. For a round decorative piece viewed all around, decide whether a line or distributed texture is less distracting. There is no requirement to select Random merely because a model is cylindrical.
Paint a target when the automatic choice misses it
PrusaSlicer’s seam-painting tool, available in Advanced and Expert modes, provides enforcers and blockers. Enforcers select an allowed target area; blockers exclude an area from seam candidates. The selected placement mode still participates in the result.
- Save the current project before changing the seam plan.
- Choose an acceptable region, considering both appearance and contact surfaces.
- Apply the supported painting control and reslice.
- Inspect several heights in preview, including where the shape changes.
- Check a representative print before committing a long decorative job.
Why painting can affect more than the visible face
Prusa distinguishes spherical and circular painting cursors. The spherical cursor can paint surfaces within its volume that are hidden from the current view; the circular cursor targets visible surfaces. Turn the model and inspect the painted region if the selection seems to reach around a corner unexpectedly.
A saved project and a preview check make this easier to diagnose than changing the paint and the placement mode repeatedly without keeping a baseline.
Separate placement from a bulky start or stop
If the seam is in an acceptable position but remains too pronounced, treat extrusion quality as a separate investigation. Use the flow-ratio and pressure-advance distinction to choose the relevant calibration instead of reducing general flow just to hide one line.
Prusa’s documentation also describes scarf seams, which overlap the start and end transition. They add time and are less effective at sharp corners and overhangs. Treat them as another supported option to inspect, not a guarantee that every seam disappears.
Give the seam a deliberate home
Save the model orientation, placement mode and any painted region with the project. Judge the printed result from the direction in which the object will actually be used.
The seam is hidden and the part fits
Keep the setup. A seam does not need further tuning merely because it remains visible under close inspection from the back.
Every possible location affects the result
Compare the least disruptive placement on a small representative print. If appearance or fit still fails the requirement, reconsider the part orientation or design rather than promising an invisible seam through settings alone.