A different material at the support contact can make removal easier without changing the entire support structure. The useful starting point is the interface: the layers between the support base and the model. For a documented PLA/PETG pairing, use the second polymer there before considering it for the whole base.
Three parts of the print, two material roles
| Region | Job | Material decision |
|---|---|---|
| Model | The part you keep | Choose for the finished object’s requirements. |
| Support base | The structure holding up the contact area | Usually retain the model material in the documented interface-only approach. |
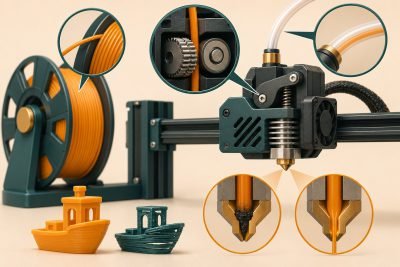
| Support interface | The contact between support and model | Assign the compatible second material using the applicable preset. |
PLA and PETG’s limited bonding can be useful at that contact. It is also a reason not to scatter the second material through the part indiscriminately. A support that releases well after printing still has to stay in place while the model is being built.
Match the pairing before copying settings
Bambu’s current mutual-support guide covers Bambu PLA Basic with Bambu PETG HF or PETG Basic. It explicitly excludes other examples such as PLA Matte, PLA Silk, PLA-CF, PETG Translucent, PETG-CF and third-party formulations. That boundary matters more than the broad PLA and PETG names.
The guide provides two directions: PETG as the model with PLA Basic at the interface, and PLA Basic as the model with PETG at the interface. Their settings differ. Select the direction that matches the material you want to keep, then use the official configuration for your printer and nozzle. P2S users are given dedicated presets rather than being told to copy every other machine’s cooling setup.
My rolls are different brands or specialty formulations
The named Bambu instructions do not validate that combination. Look for documentation for the exact materials and printer, or use a supported dedicated interface material. Do not treat the same base-polymer names as proof that the presets transfer.
Why not print all the support in the second material?
The official comparison shows that full alternate-material supports require more switching and material than an interface-only approach. It also warns that using the alternate material for the whole base can cause supports to detach. There is therefore both a time reason and a stability reason to keep the special pairing concentrated at the contact.
The savings are model- and printer-dependent. Do not reuse the example’s minutes as a promise for your job. Slice your actual object and inspect the preview: confirm which material appears in the base, interface and model, then compare the estimated time and material use.
Try the difficult contact before the full object
- Confirm the materials and machine. Match the exact pairing, printer, nozzle and build plate to the official guidance.
- Prepare the filament. Follow the documented drying requirements; Bambu specifically calls for dry materials in this workflow.
- Apply the correct scenario. Use the official preset and illustrated support settings for the model/interface direction. Preserve the working original profile separately.
- Inspect the sliced preview. Verify the material assignment and the extra switching or purge structures required by that setup.
- Print a small representative contact. Check that the support remains stable, removes acceptably and leaves the surface your project needs.
If the support comes away during the print, do not proceed to a larger job with the same setup. Recheck the material assignment and applicable preset. If removal succeeds but the underside still disappoints, compare that surface with an ordinary same-material support trial before deciding the additional complexity is worthwhile.
This decision is separate from choosing the model polymer. The PLA-versus-PETG guide addresses the finished part; the interface choice is about supporting its difficult surface during printing.
Is the cleaner contact worth the extra changes?
Keep the pairing when the representative trial improves removal or the supported surface enough to justify its time and material use.
The contact is cleaner and the support stays stable
Save the exact material assignments and preset with the project. Recheck the full model’s preview before scaling up.
The added setup does not improve the part
Retain a simpler supported workflow or reconsider orientation and contact placement. A second filament is useful only when it solves the actual support problem.