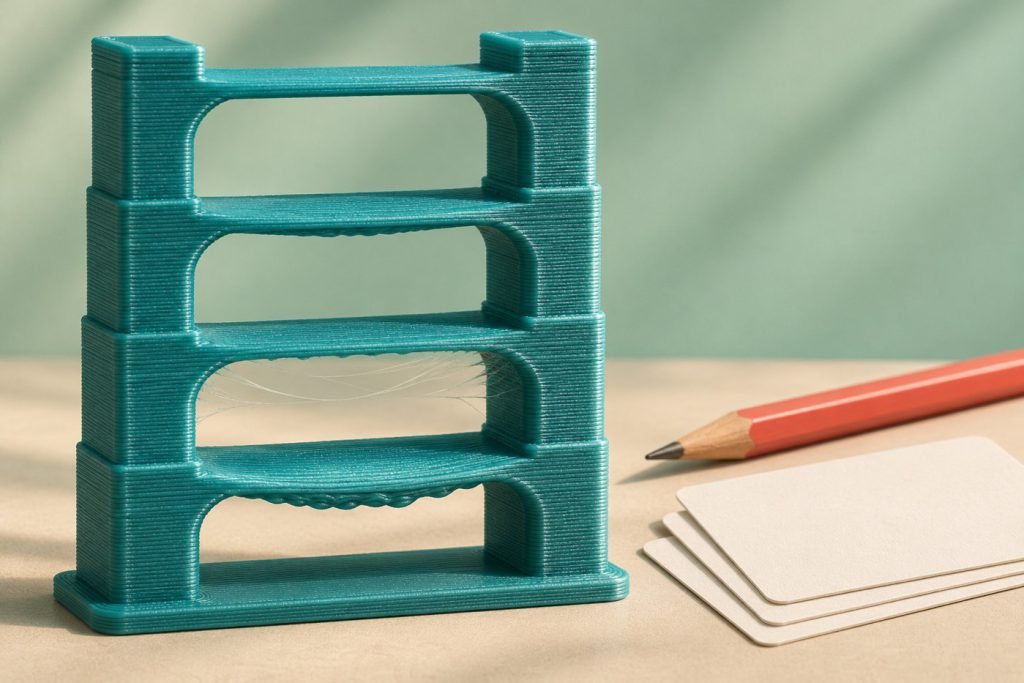
A temperature tower is useful when it narrows a filament profile choice. It is less useful when you simply pick the cleanest-looking tier and apply that number to every job. Read it against the feature your next print needs, then confirm the candidate setting on that geometry.
First, make sure the tower represents the intended test
The official OrcaSlicer temperature-calibration guide describes stacked sections printed at different nozzle temperatures. Its current tool can scale the tower for the selected nozzle, so record that option when comparing runs. An imported tower shape alone does not establish that your exported job changes temperature correctly.
Keep the selected printer, nozzle, material and profile with the test record. Choose a range supported by both the filament instructions and the printer’s limits. Preview the prepared job and confirm the intended temperature sequence using your slicer’s documented controls. Do not run downloaded machine-specific code simply because its model looks like the tower you want.
Read a tradeoff, not a beauty contest
OrcaSlicer recommends looking at stringing, layer adhesion, overhangs, bridges and surface finish together. It notes that both excessively low and high temperatures can cause problems. Where several temperatures work, its guidance suggests the middle of that interval, with the higher end worth considering for greater speed or flow. That remains a candidate to qualify for your job.
| Your next part | Give attention to |
|---|---|
| Display piece | The visible face and small detail, along with unwanted threads. |
| Open bridge | The underside of the span and whether it meets the required shape. |
| Fitted cover | The actual mating edge on a representative follow-up print. |
| Loaded part | Appropriate strength evaluation; appearance alone is insufficient. |
This is a way to prioritize observations, not a rating scale. A tidy bridge cannot establish a load capacity. Equally, a tiny thread that is easy to remove may matter less on one project than a visibly distorted functional edge.
Keep a short observation record
For each promising tier, write down its temperature and the feature that passed or failed your requirement. Use concrete descriptions such as “underside sags below the intended opening” rather than “looks worse.” Take the photographs under the same lighting and angle if you plan to compare them later.
Example of a useful note
Hypothetical observation: “Two adjacent tiers have acceptable visible faces. The cooler one has a less distorted bridge, but the intended cover has no bridge. Next test: the cover’s mating corner with the candidate profile.”
The note does not claim that either tier is stronger. It explains which observation matters and what still needs checking.
When every tier looks wrong
Do not keep extending the range beyond the documented limits. Check that the intended program actually ran, that the correct material profile was selected and that the spool is in suitable printing condition. If the recurring problem is threads, the stringing guide helps separate temperature from other plausible causes.
Keep the setup stable when repeating the test. Changing retraction, cooling, speed and temperature together leaves you unable to tell which change improved the next result.
Turn one promising tier into a usable profile
- Save the candidate in a clearly named copy of the filament profile.
- Print a small representative section of the intended part.
- Check the actual feature requirement after cooling.
- Retain the setting and test context only if that check succeeds.
If you subsequently pursue a higher extrusion rate, revisit the result under those conditions. The flow-calibration guide addresses that separate limit; a good temperature tower does not establish maximum throughput.