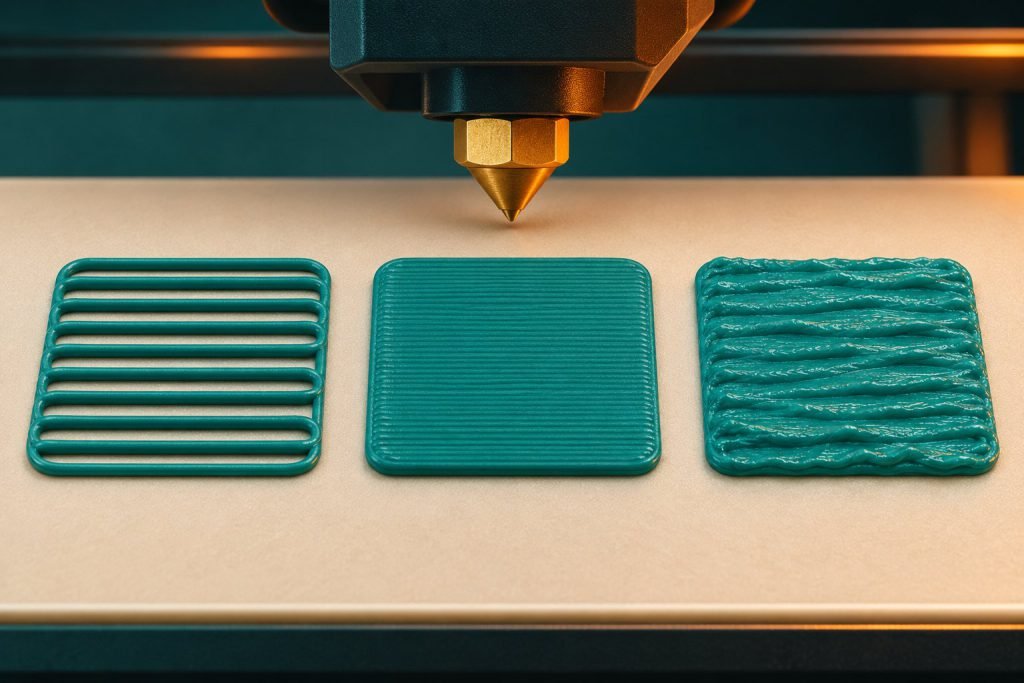
A first layer should join into an even surface. Before changing an offset, compare the lines—not the number another printer uses.
Which pattern matches your print?
| What you see | What it suggests | Next check |
|---|---|---|
| Rounded strands with gaps between them | The nozzle may be too far from the sheet | Use your printer’s first-layer calibration procedure |
| Pronounced ridges and heavily flattened lines | The nozzle may be too close | Stop if it scrapes; correct the offset through the documented procedure |
| Joined lines without ridges | Height may already be suitable | Investigate adhesion separately |
These visual cues come from Prusa’s i3 calibration guidance. Its Live Adjust Z controls and numerical ranges are specific to those printers; do not transplant them to a different leveling system.
The lines look good, but the print still detaches
Do not keep lowering the nozzle to solve every adhesion problem. Check the selected sheet and material profile, then follow the plate-cleaning procedure. Excessively low clearance can damage the sheet.
I changed the build plate
On the Prusa i3 systems covered by the source, smooth and textured sheets need their own calibration. Select the correct sheet profile rather than assuming the old offset transfers.
Make the next attempt informative
- Save a photo of the failed patch and note the active sheet profile.
- Record one change before repeating the same calibration pattern.
- Compare the new patch with the old one under similar lighting.
This is a troubleshooting record, not a requirement to chase a perfect-looking number. Once the layer is joined and even, move on to the actual fault. If the first layer is sound but corners lift later, use the corner-lifting guide.