A print that starts normally and later loses extrusion gives you a useful clue: record when it fails. That timing alone does not diagnose heat creep.
Choose the observation you can actually confirm
The spool or feed path visibly resists movement
Investigate that obstruction first. Use the spool-tangle checks if a crossed strand is visible. Do not label a physical feed restriction as heat creep.
The hotend area gets warm during a long PLA print
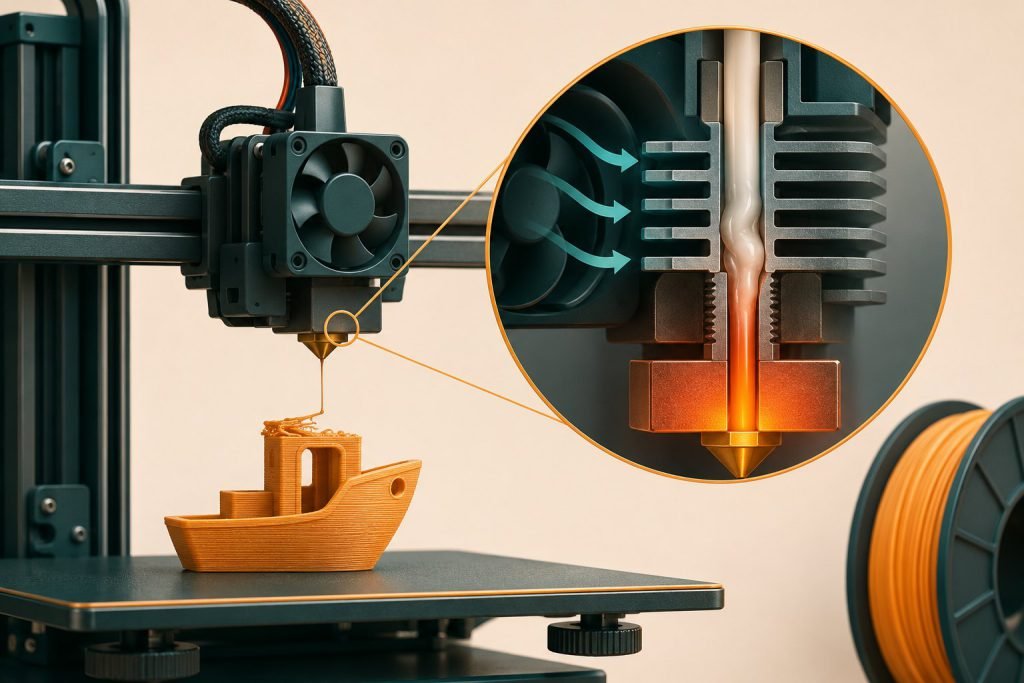
Heat traveling into the cold side can soften filament before it reaches the intended melt zone. Prusa identifies restricted heatsink airflow and warm, unventilated enclosures as contributors. Follow your printer’s documented PLA enclosure configuration and fan checks; a working part-cooling fan does not establish that the heatsink is cooled correctly.
Extrusion is poor from the beginning
Start with the manufacturer’s under-extrusion and blockage troubleshooting. Prusa explicitly cautions that heat creep is only one possible cause of a clog. A heater-temperature increase is not a universal remedy.
The thermal explanation and checks above follow Prusa’s heat-creep guidance. Use the service instructions for your own hotend before loosening, removing or replacing parts.
A cooling check you can actually perform
For the MK3-family arrangement covered by Prusa’s procedure, inspect the heatsink fan, not just the fan blowing on the print. The documented LCD path is Support → Extruder info → Fan speed; its stated Nozzle Fan range is 4,000–4,400 RPM. This range and menu do not apply to every printer.
- Record the displayed fan speed during normal operation without touching the hot assembly.
- After shutting down and cooling for inspection, look for dust obstructing the heatsink and fan. Use the model’s maintenance procedure to clear it.
- Check fan installation against the maker’s orientation diagram. A spinning fan mounted backward is not a successful check.
- Retry only after restoring the documented configuration. If a fan fails its check, repair that fault before another long print.
Example observation record—not a diagnosis
“PLA, same file, door closed, extrusion stopped after 48 minutes; spool turned freely; heatsink fan reading not recorded.” This record narrows the next check to cooling and enclosure configuration. It does not prove heat creep. Add the actual fan observation before changing extrusion temperature.
Keep a two-run comparison
| Record | Original run | Next run |
|---|---|---|
| Material and profile | Write both down | Keep them unchanged unless this is the chosen variable |
| Single documented change | Baseline | Name the change |
| Result | When extrusion stopped | Whether the same symptom returned |
If you cannot identify a normal, documented operating configuration, stop the trial and resolve that first. A shorter successful run does not demonstrate that the original long job is fixed.